Intro
As soon as one has got an interesting idea of a new app, it need to be implemented quite quickly. But first of all, let’s look at the plan everyone should hold in mind at the beginning of design process.
You need to set goals considering the structure and plan the way of app design and development. Here you find top 9 steps from the abstract idea of the practical implementation. It doesn’t matter whether it’s developed for iOS, Android or Web, this plan is universal for every developer.
This infographic leads you from “the bottom stage” to “the upper stage” of your project.
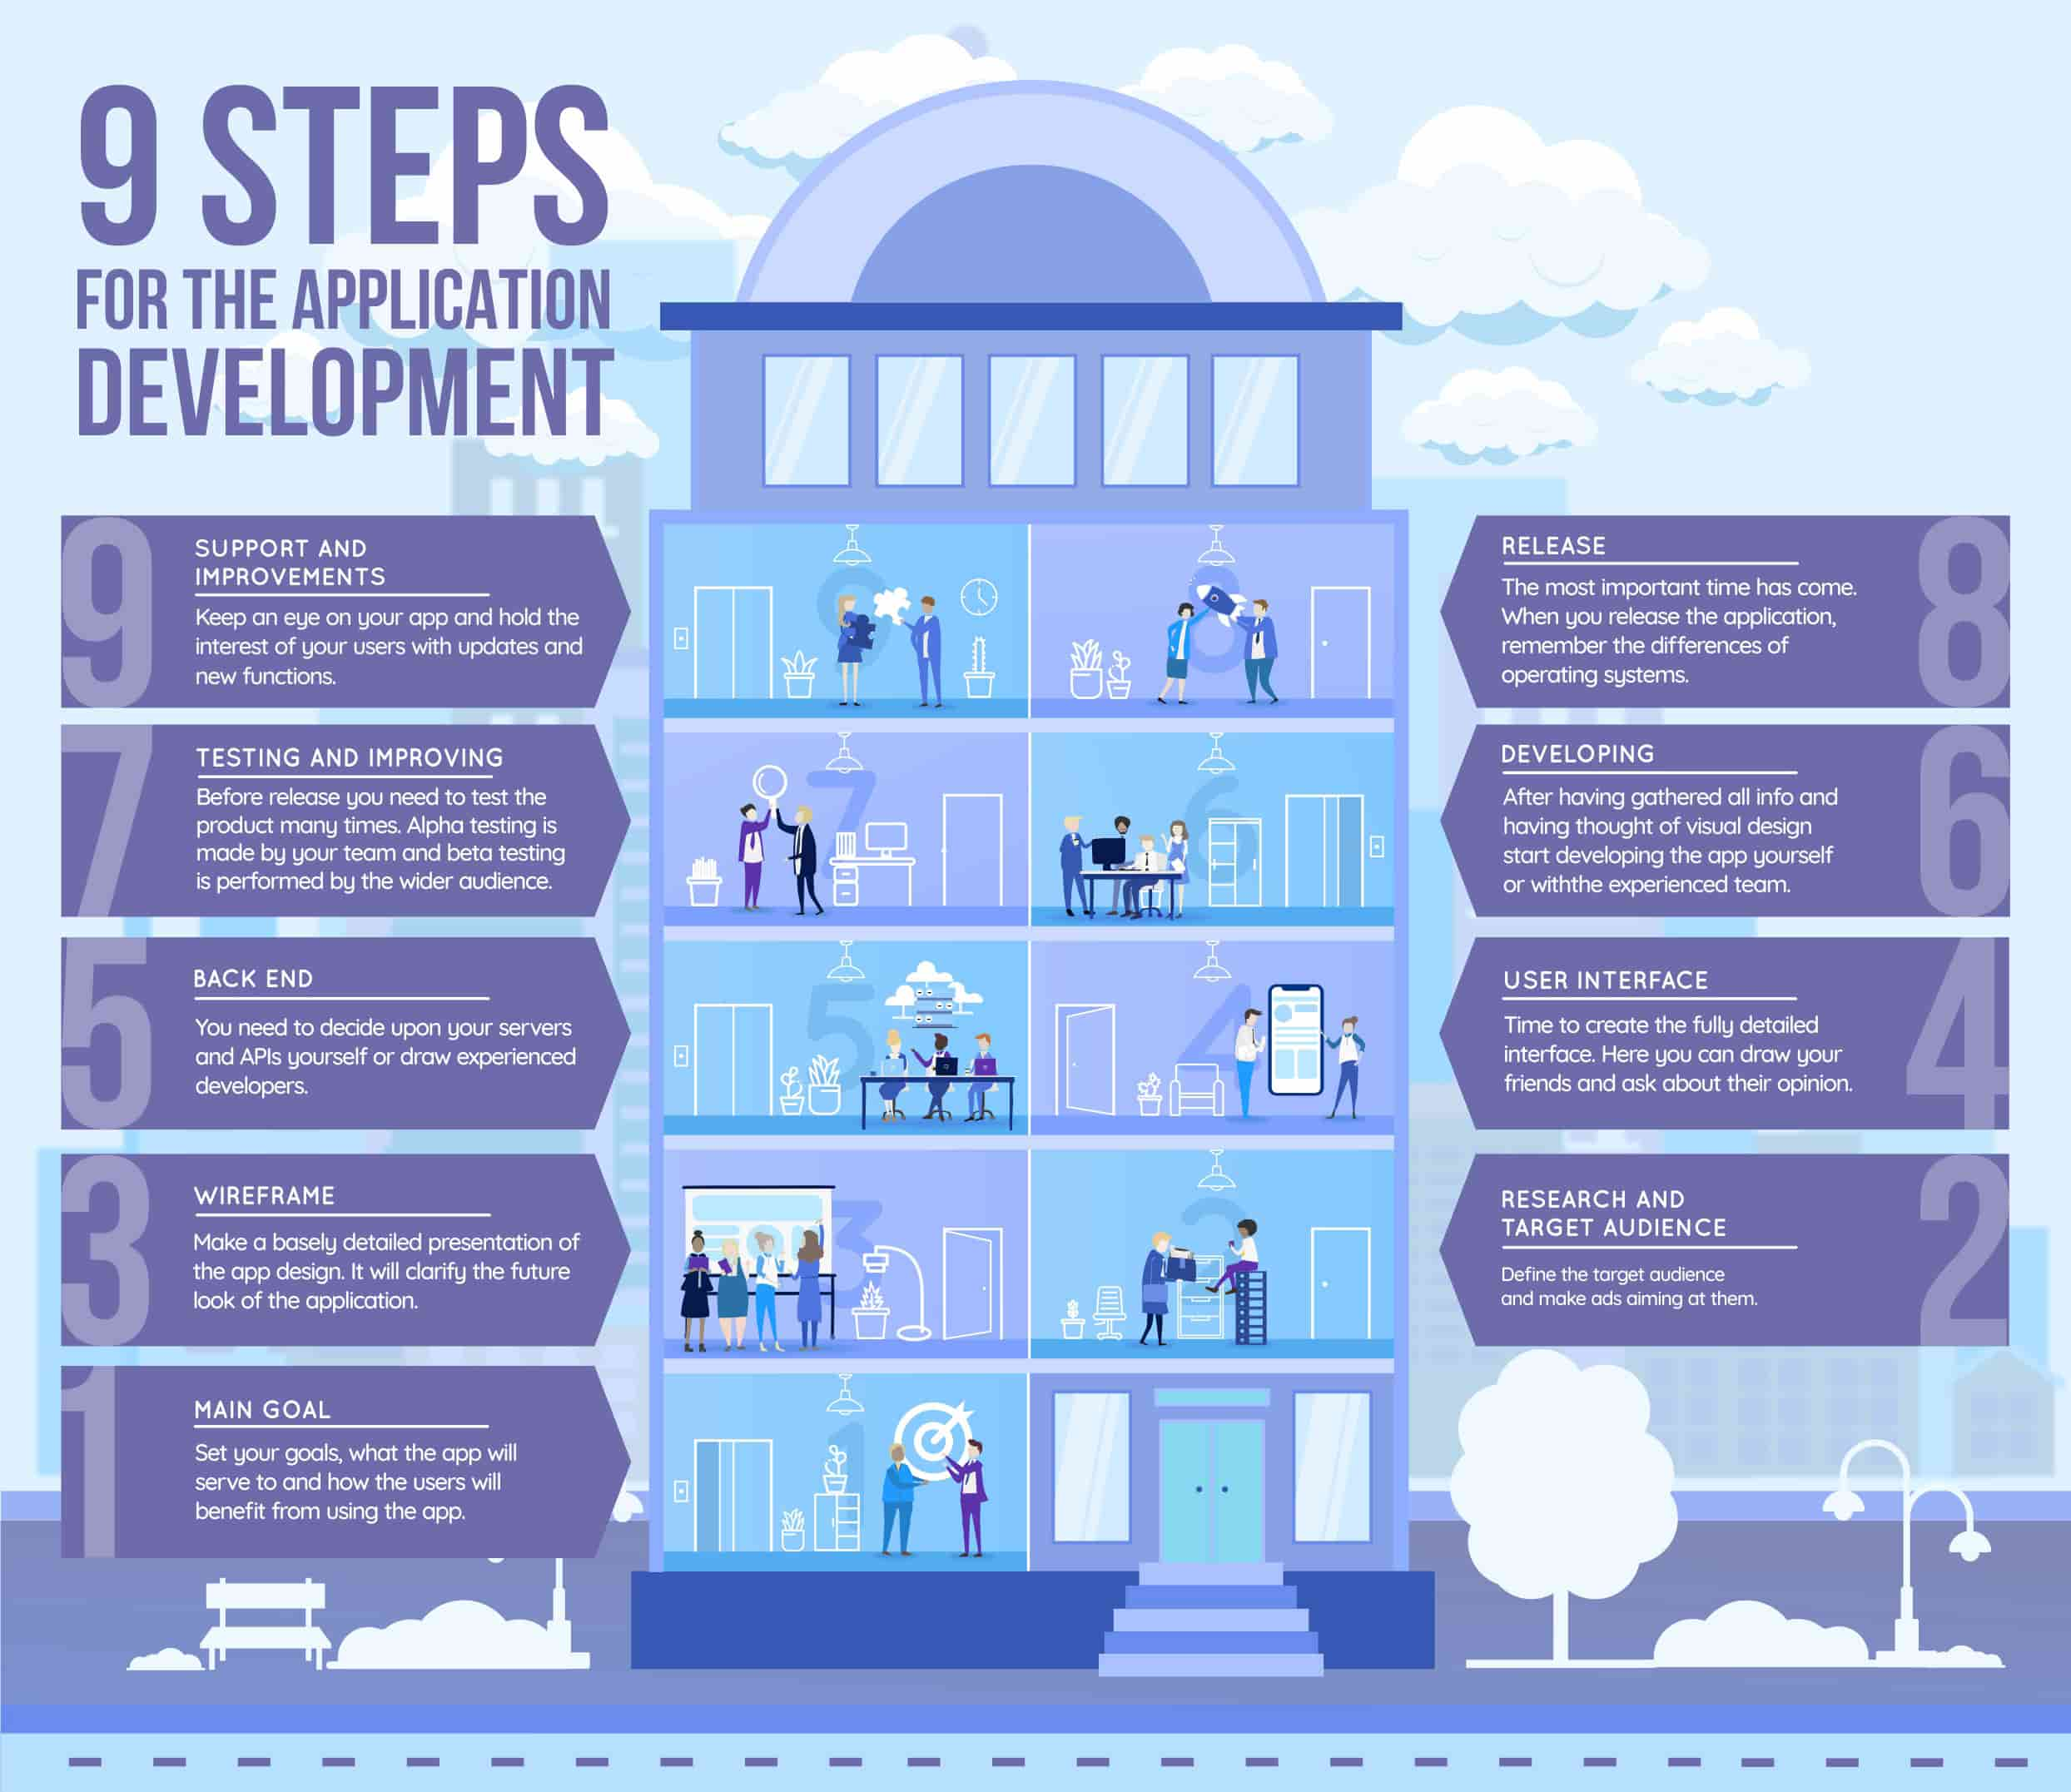
The steps of the app development are describing in general terms.
Now each of the 9 steps, its goal and necessity will be described more precisely.
1. Write down the purpose and ideas of an app
The abstract idea might turn into the specific goal. In what way is your iOS or Android application helpful for users? It should solve some problems and simplify the life of users or serve for entertainment.
Write down your ideas regarding generating money from your app. Either it’s offered for free (then you can earn money with ads appearing in the application) or paid. Each feature must be described carefully as well as precisely.
2. Market survey and target audience
It is quite common that the business owners think about their ideas as a unique ones. However, there is a probability that the similar idea has been developed before. That’s why it’s important to make a research of apps that has already exist in the market. Do the preliminary research and compare the existing apps that are similar to yours, after this you should define the advantages and disadvantages of competitors' apps.
For the successful app design and development, you should make the portrait of the average user interested in the app. The ads for adults and for teens have to be different so let’s decide what will be your target audience. After you have defined these target users, try to look through their eyes. What do they want? What sources must they learn about your app from? That would be a plus to describe your app creation idea to some of these users and to ask if it’s interesting for them, what they wish to see in the app and what seems boring.
3. Making a wireframe
The wireframe is a detailed presentation of the app design. With help of wireframes, you can clarify the future look of your app both for yourself and for developers. There are wireframing tools enough in the internet so everybody can figure out how to create a wireframe and do it rather fast.
The app design is sketched very quickly using these tools:
4. User interface
Now you should move to building the user interface. Based on your previous plans you should make the core of app design. They are clickable, look like the full-fledged product and simplify the testing (it would be preference to invite friends for testing and to listen to their opinion).
These tools help you to create the design on your own:
Also read our article: Top 6 advantages of choosing Angular for your web app.
If you have hired a designer, show him your wireframes. The experienced designer will not only create the unique design but also suggest you interesting solutions, he will draw your attention to preferable features and explain what is annoying and uncomfortable for users.
5. Decide upon the back end
After having created skins you have clarified the app design expectations and plans about the functionality of the app. But the application needs the back end, so decide whether you create it by yourself (for that you need to decide upon your servers, to develop APIs yourself) or use a service offering you back-end development and hosting, in case you do not understand how it functions.
These services can help you:
6. Start developing
It’s time to develop the app. If you hire a development team they will do the requeres things instead of you.
Here you will find popular app building platforms:
And you should make an account on Google Play and Apple. In this way your application should be brought to the market.
7. Testing and improving
Now when the demo version is ready, you should let the friends and acquaintance test your application. Especially pay attention to the opinion of those people who belong to the target audience. Ask them what they do not like and like about this app idea development. What do they want to change? Is the navigation comfortable for them? What colors do they prefer and what seems strange to them? Be ready for the criticism and improve your app design.
Take the feedback into account and improve your app. When you think everything is OK, you should start with beta testing of this app. You have to examine the final layers, interactions, and design (these platforms can help you: Proto.io and Pixate)
The same team or target audience which has tested your product for the first time helps to evaluate the changes. Ask them if the application has become better if their concerns were taken into account. Of course, the bugs have to be removed and the app design sometimes has to be modified again.
8. Time to release

Finally, the time has come! You have tested and improved the app many times and it’s time to release. The path from the construction of the idea to the full product development has beed done! But you should know some peculiarities of the operating systems.
Concerning the way of coming to the market, Android and iOS are different. If you make an Android application, you can just add it to the Android store. The same thing is with the Google Play store. But iOS is more strictly. If you publish the app on iOS, the iOS team has to review your app before release, so you have to wait a couple of days.
9. Upgrade and new materials
To release the app and to think that you’ll become rich instantly would be strange. Other new apps appear very quickly so you should keep the users interested in your app. Prepare yourself for making updates and creating new content.
Use the feedback and analytics to understand the behavior and users' interests. Such an important thing as KPI (Key Performance Indicator) measures the success of your app. There are many indicators and you should choose the right ones.
Inform the users about new functions with the help of notifications but don’t change the interface fundamentally and very often, sometimes it’s annoying for users.
News, updates, interesting functions - you need them to hold the interest of your users, for your app not to be forgotten in a couple of weeks.
Conclusion
In order to transform your visionary idea into practice and maintaine a succesfull online product you should follow 9 easy steps. Therefore, to provide the organizational development you should define purpose and ideas of an app and examine market and target audience. The next step will be making a wireframe to shape the presentation of the app design. Basing on your previous plans you should create user interface. After you decide on the functionality of the app you could start to work on the backend development. Pay attention to the the processes of testing and improving when you could collect the users' impressions regarding the app and consequently improve your product. This is quite a universal plan of app development and you could do it on your own or hire a development team. One way or another do not hesitate to transform an interesting idea into the reality!
In case, you got left any questions or suggestions, feel free to contact us and we will assist you in any inquiry!


