Intro
Recently, a stable group of leaders was formed in the world of front-end frameworks. There was many discussions about framework's strengths and weaknesses. Some of them are more productive, others are less, some are more complex, while others are easier to learn. This article focuses on step-by-step guide how to create basic Angular app and oriented on those who has already have an experience in web development.
Based on the available comparisons of popular frameworks, Angular is ideally suited for building large and medium-sized scalable mobile and web applications. At the same time, one of the shortcomings that’s often mentioned is the complexity of learning. To avoid this, consider an example of creating a simple Angular application to display the weather forecast.
It should be mentioned that Angular uses TypeScript language. Do not worry if you have not worked with it before. In short, TypeScript is a typed JavaScript with some new features. There is extensive documentation available on the official website, as well as many examples and tutorials on various web resources.
Step 1: Preparing the environment

The first thing you need to do - install Node.js. The current version for your platform can be downloaded from the official site of Node.js. It comes with the Node Package Manager (NPM) which will also be installed. It’s required to load the project’s dependencies. To verify that the installation is successful, run the following commands:
node -v
npm -v
You should receive the versions of the corresponding packages, that means the installation was successful and we can continue. Next, you need to install global support of TypeScript language in your system. To do this, execute the next command in your terminal:
npm install -g typescript
The flag -g (the short from the -global) indicates that this package will be installed globally in the system (more information on the use of NPMs is available on the official website. It is also necessary to install the Angular CLI globally (the command line interface from the Angular team, which greatly simplifies the application development process):
npm install -g @angular/cli
After the installation of the mentioned packages is successfully completed, you can start creating the Angular application itself. To do so, you need to execute the following command in CLI inside the directory with your projects:
ng new weather-app --style scss
Note: without flag --style [scss, stylus, less] CSS preprocessors will not be used by default for the project.
This command generates a new Angular application with the specified name and using SASS as the default CSS preprocessor (more details about the Angular CLI commands can be found in the official documentation. As a result, a new project directory will be created with the base application template inside. To start the application, go to its directory:
cd weather-app
and run the development server:
ng serve
Now you should see the view of your first Angular application.
Step 2: Developing weather component
Inside the project’s ./src/app folder there is root component of the application - app.component located. It is still the only one in the project. One of the best practices is to take out a wrapper component outside the app.component. In our case, the wrapper component will be weather.component. Let's create it with the following Angular CLI command:
ng generate component weather
As a result, the directory of the new component “weather” is created in the folder ./src/app with the following files:
weather.component.scss - the component styles;
weather.component.html - the component view template;
weather.component.spec.ts - the component unit tests;
weather.component.ts - the component file itself.
Let’s focus on Component decorator where the metadata of our component is indicated:
@Component({
 selector: 'app-weather',
 templateUrl: './weather.component.html',
 styleUrls: ['./weather.component.scss']
})
Selector is an identifier for the component usage in templates of other components, templateUrl and styleUrl are links to the template file and component styles. In addition, after component creation, Angular CLI declares it in the application module, which allows it to be used immediately in other components that are declared in this module.
import { BrowserModule } from '@angular/platform-browser';
import { NgModule } from '@angular/core';
import { AppComponent } from './app.component';
import { WeatherComponent } from './weather/weather.component';

@NgModule({
 declarations: [
   AppComponent,
   WeatherComponent
 ],
 imports: [
   BrowserModule
 ],
 providers: [],
 bootstrap: [AppComponent]
})
export class AppModule { }
In other words, we can apply the weather component inside the root component - app component. So, let's organize our application this way - add weather component to the app component as its child. app.component.html should look like this:
<app-weather></app-weather>
After saving the changes, the development server will refresh the page in the browser and you will see the view of the weather component (so far, just the inscription "weather works!").
Let's talk about the data that we expect to process in our application. Suppose that we are dealing with a list of cities, and for each one will be available a weather forecast. The forecast will include the following indicators:
weather conditions;
wind (speed and direction);
temperature (for day and night).
Using these details, we can describe a new data type (let's call it the Forecast). We can use a special TypeScript feature - Interfaces to do that. Just run the next command in the terminal to create the new interface:
ng generate interface core/interfaces/forecast
As you can see, with this command we have created the ./src/app/core/interfaces directory and put the interface file “forecast.ts” inside. Now we can describe our data type “Forecast” in it:
export interface Forecast {
 conditions: string;
 wind: {
   speed: number;
   direction: string;
 };
 temperature: {
   day: {
     min: number;
     max: number;
   },
   night: {
     min: number;
     max: number;
   }
 };
}
Note: the "export" keyword allows us to import the declared interface later for using in components.
As you can see, the interface is formally an object, which declares the data types of its keys instead of values. So, we have described the data structure of the weather forecast itself.
At this point, we would have finished describing our data if we had made a forecast for one city. But, since we are dealing with a list of cities, we need to describe the data type of the element of this list. To do this, create another interface (let's call it City):
ng generate interface core/interfaces/city
The city list element will include the name of the city and the forecast for it.
import { Forecast } from './forecast';

export interface City {
 name: string;
 forecast: Forecast;
}
Note: here we can import and use the Forecast interface as it was marked with “export” keyword before.
Now that all the data types are described, we can start creating a component template.The markup of our page will have the following scheme:
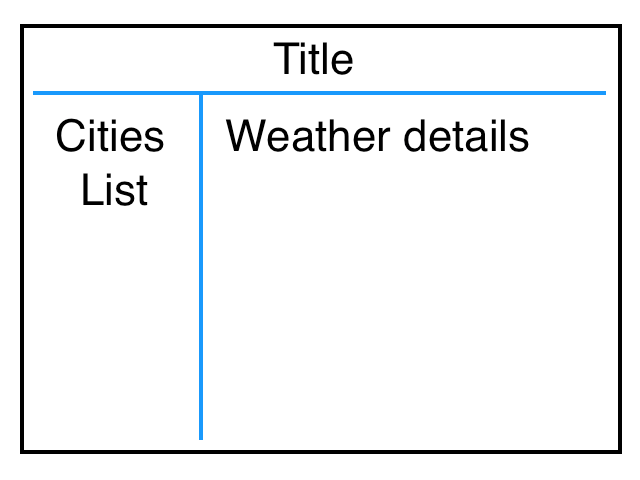
To do this, create HTML markup and add styles to it:
<div class="page">
 <div class="page-header">Weather Forecast</div>
 <div class="page-body">
   <!--Cities list will be here soon...-->
 </div>
</div>
.page {
 width: 100%;
 height: 100%;
 padding: 20px;

 &-header {
   display: flex;
   justify-content: center;
   align-items: center;
   width: 100%;
   max-width: 1140px;
   height: 80px;
   margin: 0 auto;
   border-bottom: 2px solid #007fff;
   font-size: 36px;
   font-weight: 700;
   color: #0e63c7;
 }

 &-body {
   display: flex;

   width: 100%;
   max-width: 1140px;
   min-height: calc(100vh - 120px);
   margin: 0 auto;

   &__sidebar {
     width: 300px;
     border-right: 2px solid #007fff;
   }

   &__details {
     width: 100%;
   }
 }
}
And we need to add some common styles to restore default browser properties. For these purposes, the Angular application has file src/styles.scss. Unlike styles written directly in the component, the styles described in this file have an effect on the entire project.
* {
 box-sizing: border-box;
}

body {
 margin: 0;
}

a, a:hover, a:focus, a:active {
 text-decoration: none;
}
Next, we need data in the format of a list of cities with their forecasts to be displayed in our application. In Angular, the data sources are special tools called Services. With the help of the following command, we will create a new service in ./src/app/core/services/ directory, and as it will return us the list of cities. Let's call it City:
ng generate service core/services/city
Then add a method “getCities” to this service that will return a list of cities with forecasts in the form of an array.
import { Injectable } from '@angular/core';
import { City } from '../interfaces/city';

@Injectable({
 providedIn: 'root'
})
export class CityService {

 getCities(): Array<City> {

 }

}
In the majority of real Angular applications, the services receive data from some API, by interacting through HTTP requests. Working with HTTPS requests is not within the scope of this article and will be discussed later. At this time let’s just create a file “./src/app/mocks/cities.mock.ts” with test data that will be imported into our service.
import { City } from '../core/interfaces/city';

export const CITIES: Array<City> = [
 {
   name: 'New-York',
   forecast: {
     conditions: 'cloudy',
     wind: {
       speed: 6,
       direction: 'north-west'
     },
     temperature: {
       day: {
         min: 14,
         max: 18
       },
       night: {
         min: 5,
         max: 8
       }
     }
   }
 },
 {
   name: 'London',
   forecast: {
     conditions: 'rain',
     wind: {
       speed: 3,
       direction: 'east'
     },
     temperature: {
       day: {
         min: 11,
         max: 14
       },
       night: {
         min: 3,
         max: 7
       }
     }
   }
 },
 {
   name: 'Tokyo',
   forecast: {
     conditions: 'sunny',
     wind: {
       speed: 2,
       direction: 'south'
     },
     temperature: {
       day: {
         min: 22,
         max: 28
       },
       night: {
         min: 16,
         max: 19
       }
     }
   }
 }
];
Now we will modify our service so that the method “getCities” returns the test data from the created file:
import { Injectable } from '@angular/core';

import { City } from '../interfaces/city';
import { CITIES } from '../../mocks/cities.mock'; // importing test data

@Injectable({
 providedIn: 'root'
})
export class CityService {

 getCities(): Array<City> {
   return CITIES;  // method returns an array of cities
 }

}
An array of cities with their weather forecast is available in the service. But there is a question: how to access service methods from a component? To do that Angular provides a special mechanism so that any component can receive data from the source - the Dependency Injection (DI). With this mechanism, we can essentially create a relationship between the component variable and the service class. To implement this approach, let's modify our component as follows:
import { Component, OnInit } from '@angular/core';
import { City } from '../core/interfaces/city';
import { CityService } from '../core/services/city.service';

@Component({
 selector: 'app-weather',
 templateUrl: './weather.component.html',
 styleUrls: ['./weather.component.scss']
})
export class WeatherComponent implements OnInit {

 cities: Array<City> = []; // create empty array of cities

 constructor(private cityService: CityService) { } // inject CityService to private variable

 ngOnInit() {
   this.cities = this.cityService.getCities(); // on component initialize get data from service to local variable
 }

}
Excellent! Now the data is available in the component. What remains is to bring data into the template. Angular has something to help us. It provides directives for controlling the display and the behavior of template elements. In this case, we will benefit from the “NgFor” directive, which allows displaying the elements of the iterable object in a loop, presenting them as DOM elements.
Let's display our array of cities in the form of an HTML list:
<div class="page">
 <div class="page-header">Weather Forecast</div>
 <div class="page-body">
   <div class="page-body__sidebar">
     <ul class="cities-list"> <!--Added the list of cities-->
       <li class="cities-list__item" *ngFor="let city of cities">
           {{ city.name }}
       </li>
     </ul>
   </div>
   <div class="page-body__details">
     <!--Forecast will be here soon...-->
   </div>
 </div>
</div>
and add some styles to the end of weather.component.scss in order to beautify our list:
.cities-list {
 width: 100%;
 padding: 0;
 margin: 0;
 list-style: none;
 &__item {
   display: flex;
   justify-content: flex-start;
   align-items: center;
   font-size: 32px;
   color: #00a4ff;
   margin: 0;
   padding: 20px;
   width: 100%;
   min-height: 70px;
   border-bottom: 1px solid #e0dddd;
   transition: color .2s ease-out;
   cursor: pointer;
   &:hover {
     color: #ff5b00;
   }
 }
}
Note: The method for the output of a component's class variable in its template is called “string interpolation”. The syntax involves placing the TypeScript code inside {{ }}, that we did by putting there the variable containing the string.
After applying the specified markup and styles, our application will take the following form:
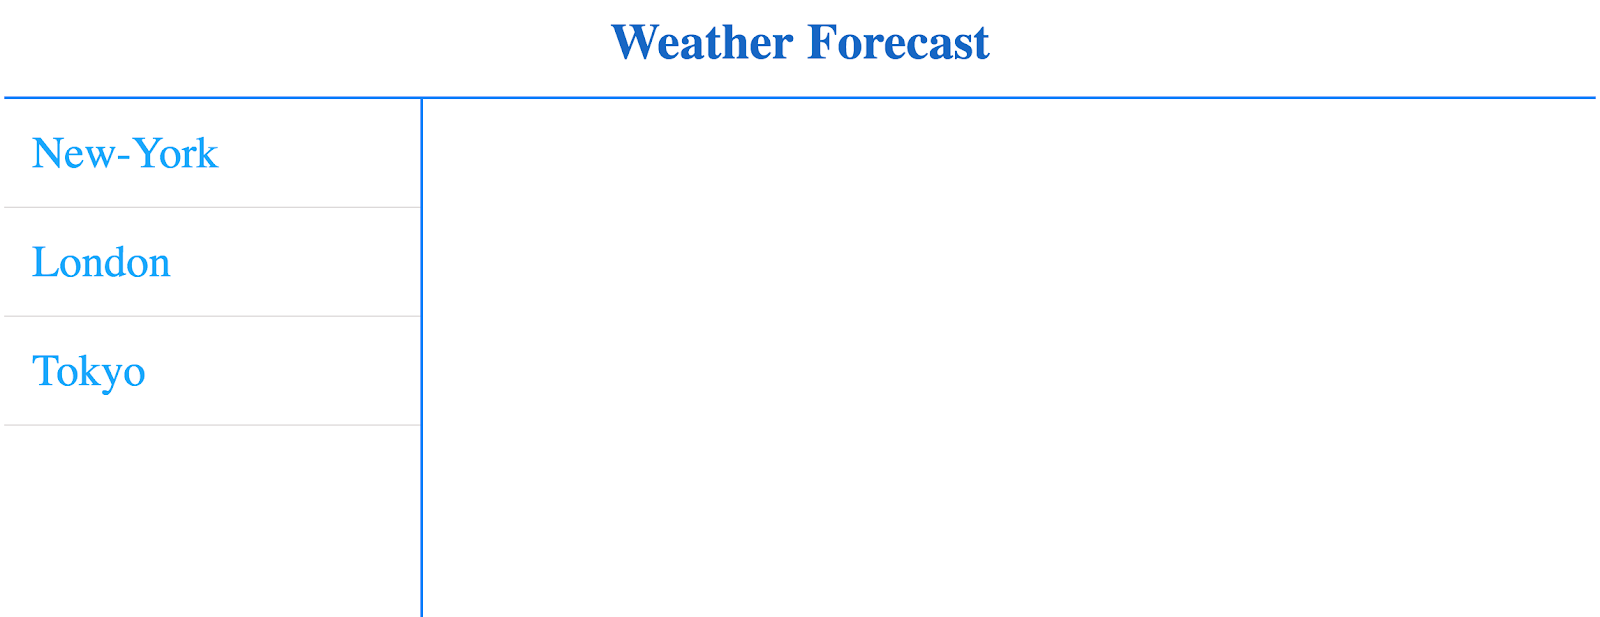
Ok, now our application displays a list of cities, but their forecasts are hidden. The next goal is to show the forecast for the selected city. But before that, we should create a handler for choosing a city. It is logical that we will choose the city by clicking on it. So, let's add the functionality of city selection to our weather.component.ts:
import { Component, OnInit } from '@angular/core';
import { City } from '../core/interfaces/city';
import { CityService } from '../core/services/city.service';

@Component({
 selector: 'app-weather',
 templateUrl: './weather.component.html',
 styleUrls: ['./weather.component.scss']
})
export class WeatherComponent implements OnInit {

 cities: Array<City> = [];
 chosenCity; // create variable for saving current (chosen) city

 constructor(private cityService: CityService) { }

 ngOnInit() {
   this.cities = this.cityService.getCities();
 }
 onChooseCity(index: number): void { // create method, which will handle choose of the city
 this.chosenCity = index;
}
}
From the above code snippet, you can see that we have created a method for processing the city selection, which takes its index in the list of cities as a parameter and assigns it to the variable “chosenCity”. This method does not return anything when called, as indicated by the type "void" of the returned value.
Next, we somehow need to link the click on the city name (if literally - to the HTML list element) with the method of the component class. For this, Angular has a feature for binding the component's template event to its class method. So alter the component template in the following way:
<div class="page">
 <div class="page-header">Weather Forecast</div>
 <div class="page-body">
   <div class="page-body__sidebar">
     <ul class="cities-list"> <!--Added the list of cities-->
       <li class="cities-list__item"
         *ngFor="let city of cities; index as i" <!--adding an element index to an array "cities"-->
         (click)="onChooseCity(i)"> <!--binding an element clique to the method of the component class -->
           {{ city.name }}
       </li>
     </ul>
   </div>
   <div class="page-body__details">
     <!--Forecast will be here soon...-->
   </div>
 </div>
</div>
Note: to avoid errors remember to remove comments from tag <li>
We can check whether our method works on list item click. To do this, simply add a line of code to the method that will output the parameter (in`ex) that the method receives to browser console.
onChooseCity(index: number): void {
 console.log(index); // logging the index of the city in the browser console
 this.chosenCity = index;
}
Now, if everything was done correctly, by clicking on one of the cities we see its index in an array of cities in the browser console. Output to the console is a very common way to test the code at various stages of its execution. So, we have displayed a list of cities and created functionality for saving the index of the active city by clicking on it.
Step 3: Creating weather-details component

Now we can start developing a component for displaying the weather forecast for the selected city. As we did it before, we create a new component using the Angular CLI command:
ng generate component weather/weather-details
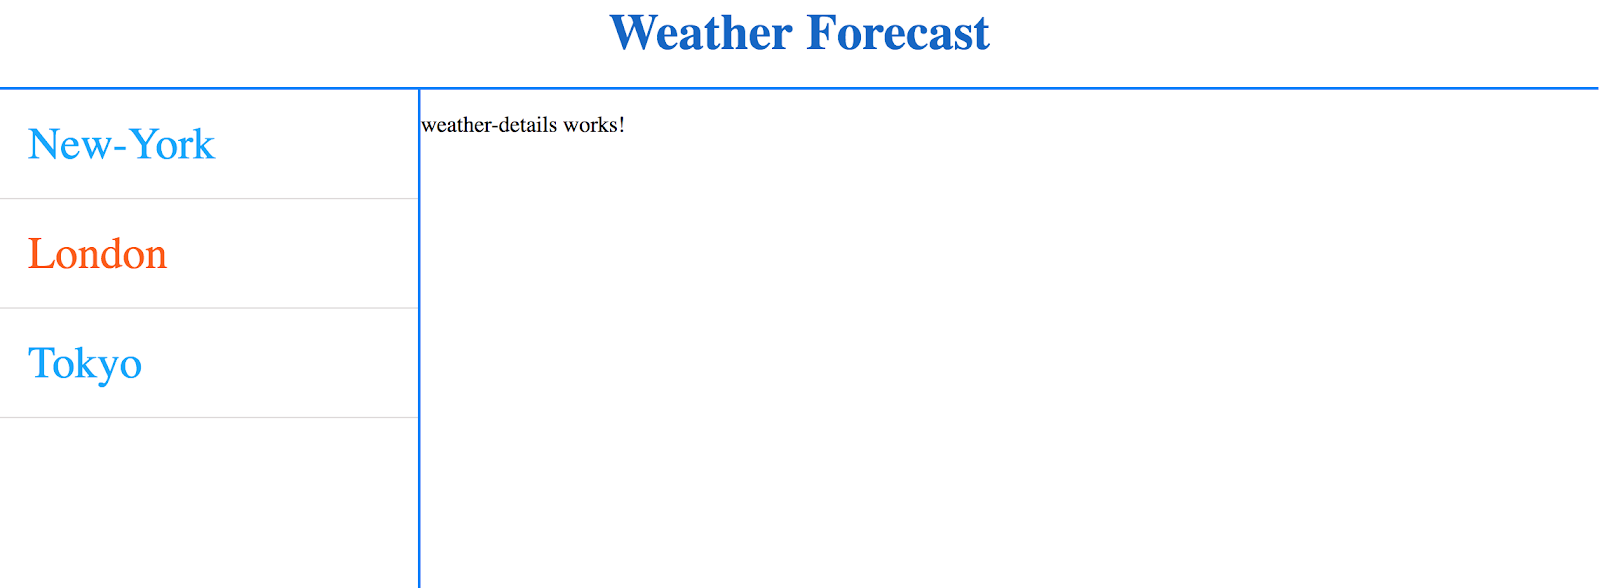
As we can see, within the directory of the weather component, the directory of the weather-details component with the necessary files was created. This structure warns the hierarchy of components - the weather-details component is a child relative to the weather component. Similarly, as we previously added the weather component to the app component, add the weather-details component to the weather component. To do this, in the weather component template, replace the ```“" ``` comment with the following line:
<app-weather-details></app-weather-details>
We added one instance of weather-details' component, but we won't see it, because we did not choose some city. To hide and display the DOM elements, Angular provides a structural directive ```“*ngIf” ```, which, depending on the truth of the condition transferred to it, displays or deletes the corresponding HTML element. Since earlier we implemented the index saving functionality of the selected city, now we can check it, and if it is a number > -1 (indexes of cities start from 0) - to display the weather-details' component.
So, let's change the weather component template so that the class "visible" is assigned to the city’s weather-details component, providing that the given city is selected.
<div class="page">
 <div class="page-header">Weather Forecast</div>
 <div class="page-body">
   <div class="page-body__sidebar">
     <ul class="cities-list"> <!--Added the list of cities-->
       <li class="cities-list__item"
         *ngFor="let city of cities; index as i"
         (click)="onChooseCity(i)"> <!--binding an element clique to the method of the component class -->
           {{ city.name }}
       </li>
     </ul>
   </div>
   <div class="page-body__details">
    <app-weather-details *ngIf="chosenCity >= 0"></app-weather-details>
   </div>
 </div>
</div>
After compiling the code, our application will take the following form:
Before we move forward to develop a weather-details' component template, let's consider the transfer of data between components, since our next task is to pass the forecast of each city to its weather-details' component.
In Angular the data between the parent and the child component is transferred according to the next rules:
from parent to child - using property binding;
from child to parent - using event binding.
In the context of our application, we will use property binding only, as in our case the weather-details' component does not involve transferring any data to the parent weather component.
The method of binding properties, as its name suggests, involves binding the custom property of the child component with data that is supposed to be passed to it. On the other hand, the custom property must be declared in the class of the child component with the help of the ```@Input()``` decorator.
In the context of our application, it will look like this:
<app-weather-details
 *ngIf="chosenCity >= 0"
 [forecast]="cities[chosenCity].forecast">
</app-weather-details>
@Input() forecast;
The "forecast" variable of the weather-details' component now contains the object with the weather forecast for the selected city. To give our application a more attractive look, let's connect the icons font with weather icons.
For example, we will use Weather Icons, which are available as npm package. To use them, we have to install npm package with the command:
npm install --save weather-icons-npm
Then we need to include the font to common styles of our project using CSS imports. To do this, insert the following line at the beginning of the styles.scss:
@import '~weather-icons-npm/css/weather-icons.min.css';
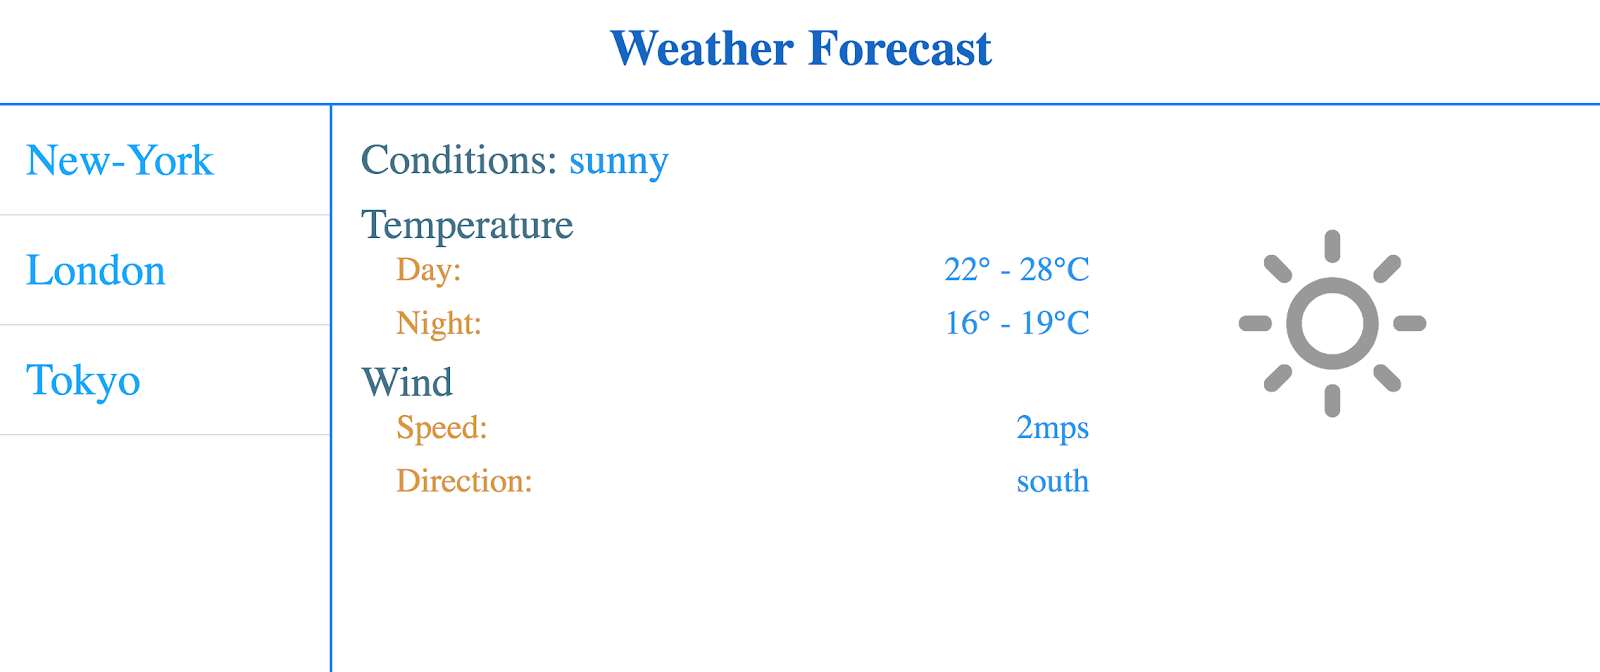
Let's edit the template and styles of the weather-details component to beautify the weather forecast display.
<div class="forecast">
<div class="forecast-data">
<div class="forecast-row">
<span class="forecast-row__title">Conditions: </span>
<span class="forecast-row__description">{{ forecast.conditions }}</span>
</div>
<div class="forecast-row">
<span class="forecast-row__title">Temperature </span>
<div class="forecast-subrow">
<span class="forecast-subrow__title">Day: </span>
<span class="forecast-subrow__description">
{{ forecast.temperature.day.min }}° - {{ forecast.temperature.day.max }}°C
</span>
</div>
<div class="forecast-subrow">
<span class="forecast-subrow__title">Night: </span>
<span class="forecast-subrow__description">
{{ forecast.temperature.night.min }}° - {{ forecast.temperature.night.max }}°C
</span>
</div>
</div>
<div class="forecast-row">
<span class="forecast-row__title">Wind </span>
<div class="forecast-subrow">
<span class="forecast-subrow__title">Speed: </span>
<span class="forecast-subrow__description">{{ forecast.wind.speed }}mps</span>
</div>
<div class="forecast-subrow">
<span class="forecast-subrow__title">Direction: </span>
<span class="forecast-subrow__description">{{ forecast.wind.direction }}</span>
</div>
</div>
</div>
<div class="forecast-logo">
<i class="wi wi-day-{{forecast.conditions}}"></i>
</div>
</div>
.forecast {
 display: flex;
 justify-content: space-between;
 align-items: center;
 width: 100%;
 padding: 20px;

 &-data {
   width: 60%;
 }

 &-row {
   margin-bottom: 10px;

   &__title {
     font-size: 30px;
     color: #427188;
   }

   &__description {
     font-size: 30px;
     color: #2196f3;
   }
 }

 &-subrow {
   display: flex;
   justify-content: space-between;
   padding-left: 25px;
   margin-bottom: 10px;

   &__title {
     font-size: 24px;
     color: #dc9833;
   }

   &__description {
     font-size: 24px;
     color: #2196f3;
   }
 }

 &-logo {

   height: 100%;
   width: 40%;
   opacity: .4;

   i {
     display: block;
     text-align: center;
     font-size: 120px;
   }
 }
}
Finally, we got the next view of our application:
So, after the mentioned manipulations, we got a simple Angular demo application that illustrates the basics of working with Angular CLI, TypeScript and Angular components. We examined the ways of interaction between the component class and its template, between the parent and the child components, and between the component and the Angular service. As you can see, studying Angular is not so complicated.
Read the 2nd part of our article about developing weather forecast app.
But it is an interim stage of our app because we want to have the list of cities and weather forecast inside different blocks of the page. The development of our application will continue in the next article coming soon.


