
Short description of the article
Intro
Setup of an Angular project
Testing for PWA features
Converting the app into PWA
PWA testing
Conclusion
Intro
Progressive Web Apps (PWA) is one of the top trends in web development. In fact, PWA is a website that meets the following requirements:
Reliability - instant download and correct operation even if the network access is unstable;
High performance - immediate reaction to user actions, the use of various animation effects;
User-friendly - work in full-screen mode on any type of device with any screen size.
In other words, a modern SPA should implement the following features:
Contain a web manifest;
Have a service-worker for caching application resources;
Use https protocol.
Web manifest is a JSON file, which contains some of the information about the application - name, description, icons of various sizes, options of application displaying. More details of its structure will be considered while working with the example.
The service-worker is responsible for caching the application resources in the browser to minimize incoming traffic and the correct operation of the application in case of unstable connection to the network.
1. Setup of an Angular project

The Angular team, as always, didn’t stay away from world trends and developed a mechanism for adding PWA capabilities to the Angular application. Let's see how this works on a real example.
To begin with, you should install (if not already installed) the latest version of Angular CLI globally into the system.
npm install -g @angular/cli
Next, use it to create a new application:
ng new progressive-web-app
It should be noted that the web manifest can be tested using the development server, and if you want to see the work of the service worker, it will require the creation and serving of a production build. In the framework of this article, we will use the command line tool http-server for serving production build.
So, create a production build of the project:
ng build --prod
To install http-server (if not already installed) globally run next command:
npm install -g http-server
Run the server for our build without specifying any options:
http-server ./dist/progressive-web-app
Also, read our article: Creating Basic Angular Application in 10 minutes - Part 1.
2. Testing for PWA features
Now we have built our project without PWA features. Google Chrome Dev Tools on the Audit tab provides the ability to verify the website's compliance with the PWA template.
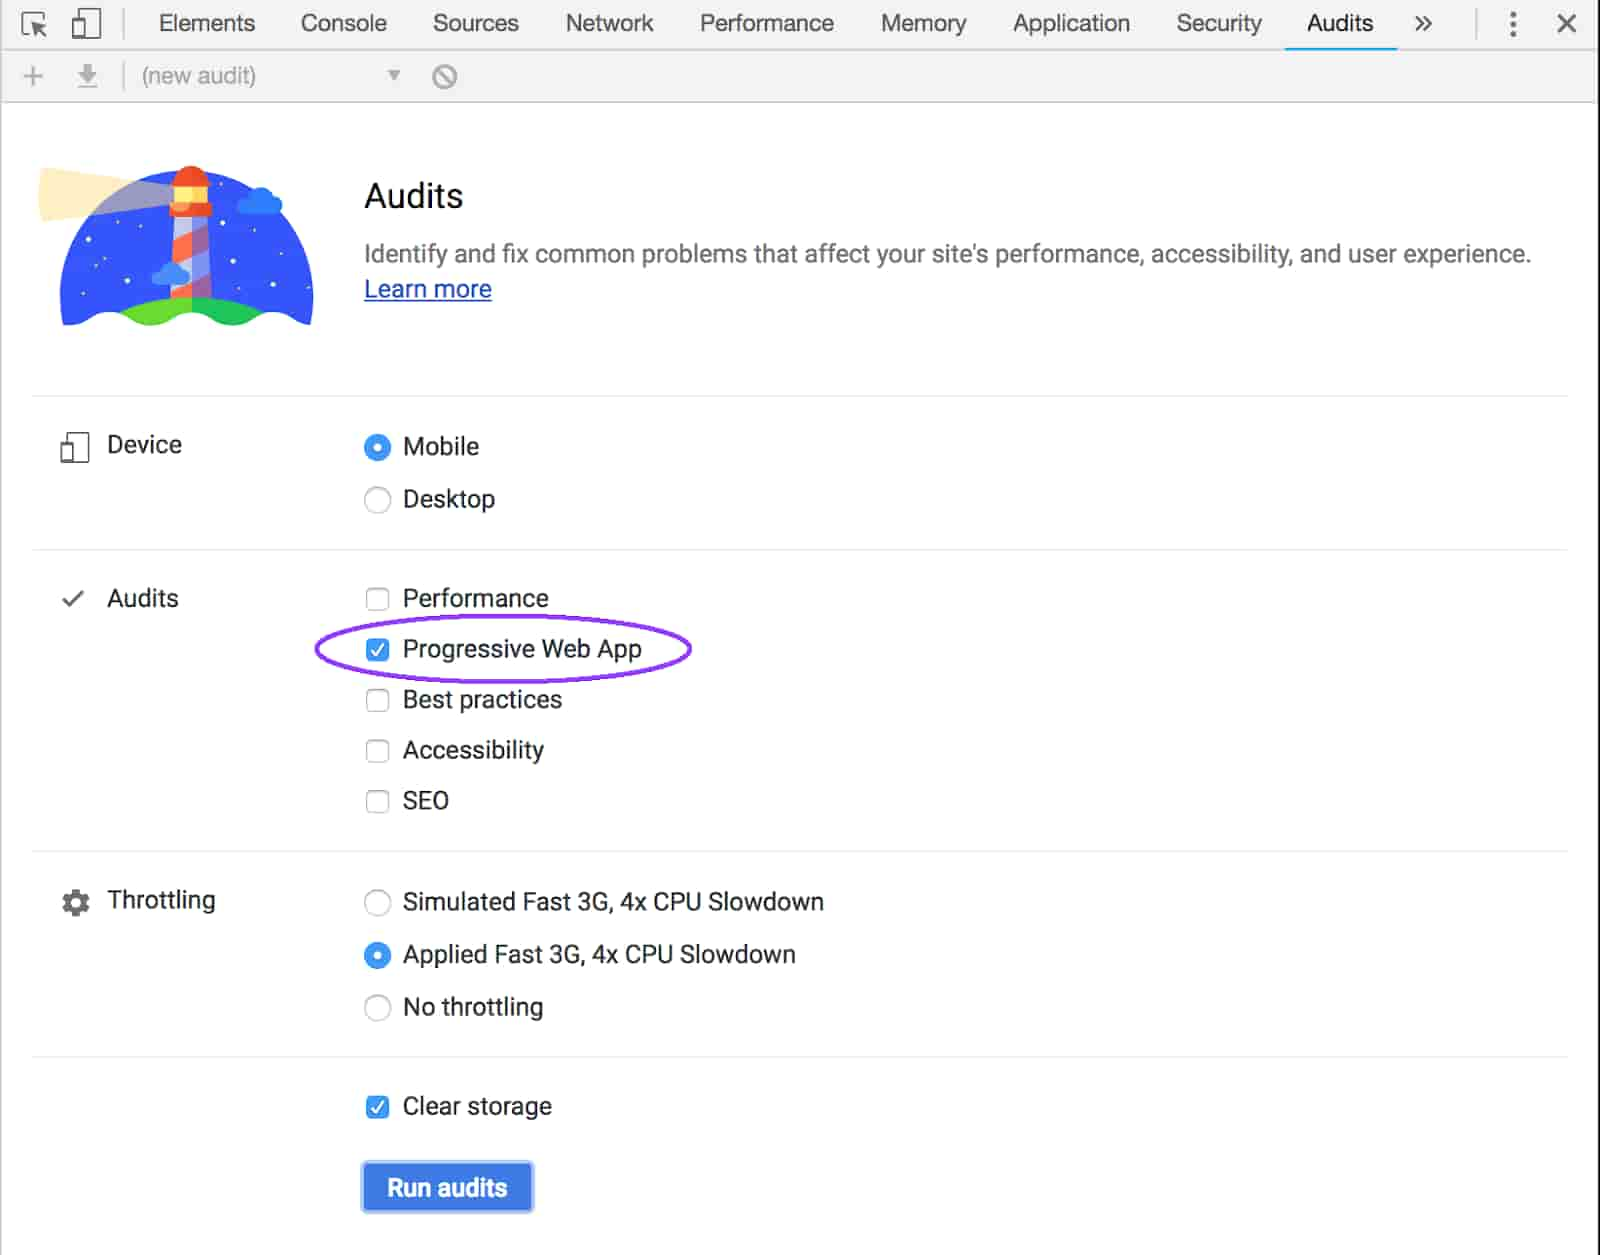
After completing the analysis, we might observe certain drewbacks in the performance. Thus,the main flaw is that there is a lack of a service-worker, a web manifest, the redirection from HTTP to HTTPS, etc.
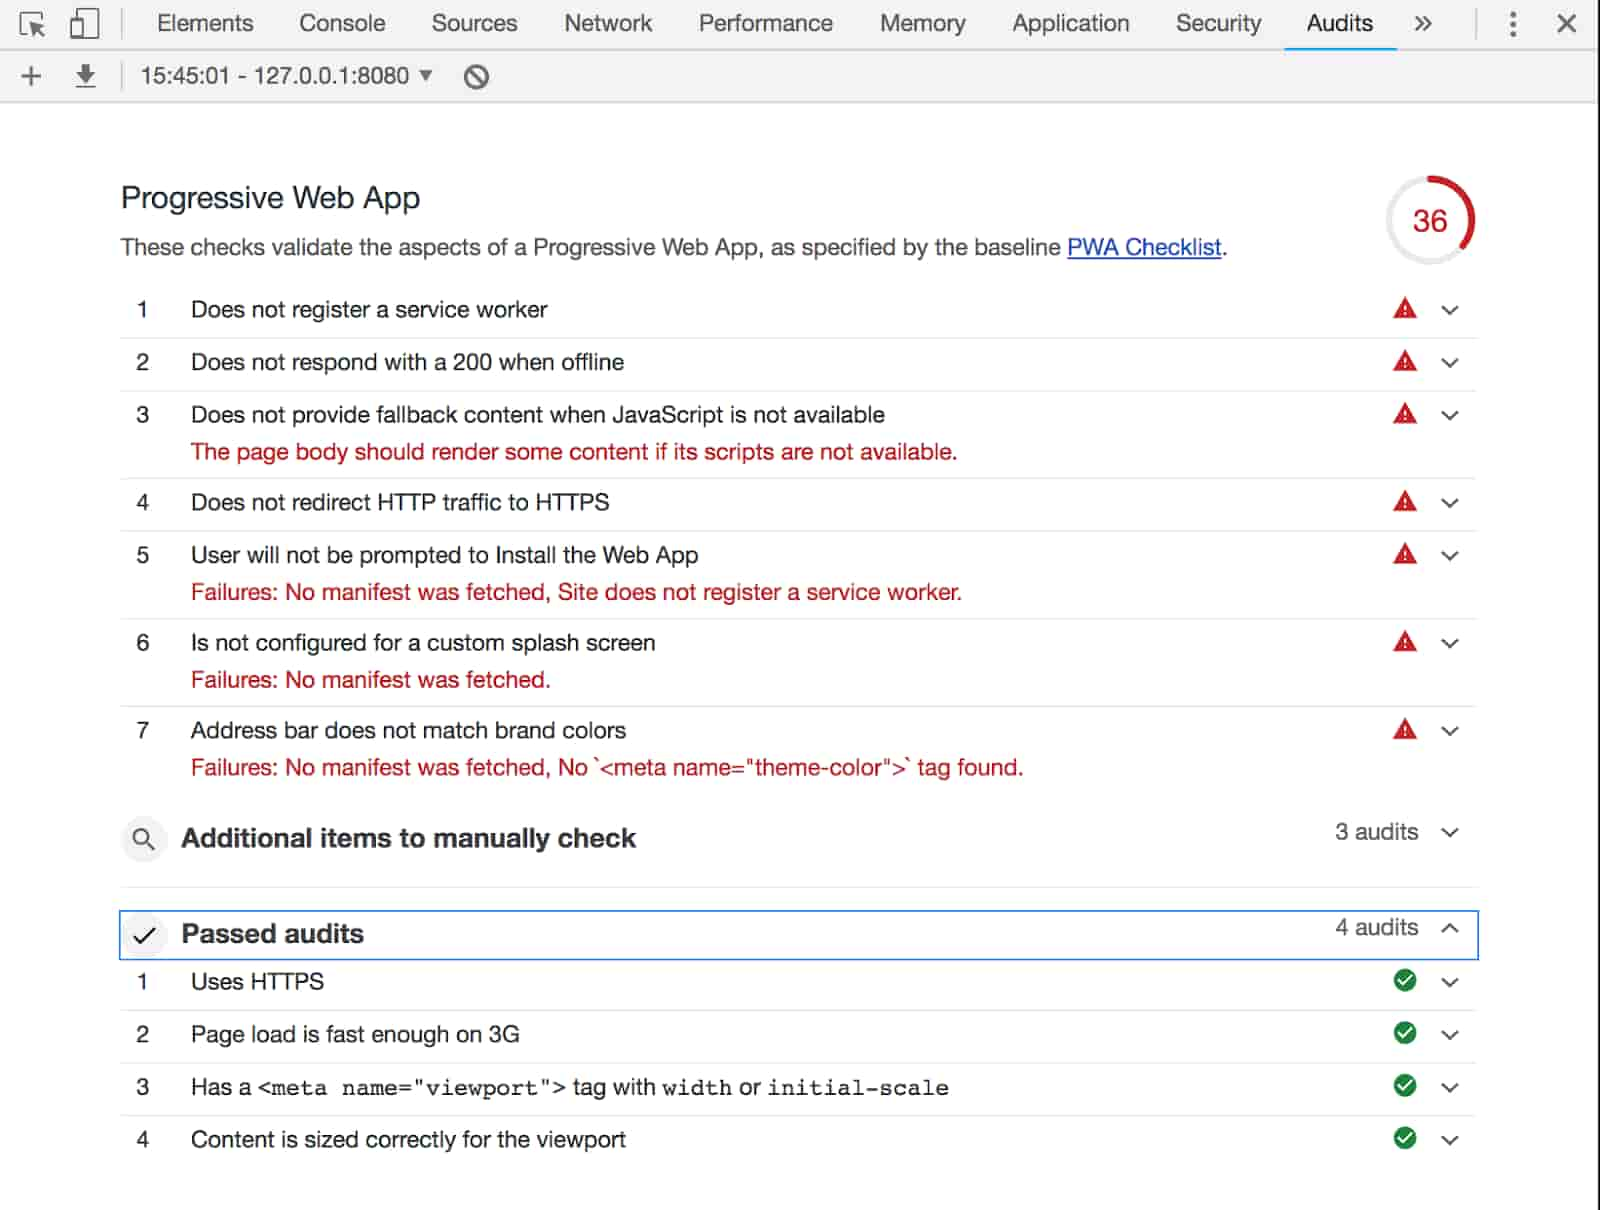
The entire list of identified problems can be conditionally divided into two groups: Application and Server shortcomings. Problems related to server settings are not relevant to the Angular application and will not receive significant attention in this article.
3. Converting the app into PWA
As it was mentioned earlier, the creators of Angular have taken care of ensuring that the SPA in their framework meets modern requirements. To do this, it is enough to execute one Angular CLI command, which will convert our application into PWA.
3.1 PWA package installation
ng add @angular/pwa
Briefly about the made changes:
-
Dependencies @angular/service-worker and @angular/pwa were installed and saved in package.json.
-
ServiceWorkerModule was imported in AppModule.
-
File ngsw-config.json with service-worker configuration was created in the root directory of the project.
-
Set of icons was created in the assets’ directory.
-
Manifest.json was created in the source directory, index.html and angular.json were updated with it.
-
Section no-script was added to index.html.
3.2 Service-worker configuration
So, let's start with the service-worker.
ServiceWorkerModule.register('/ngsw-worker.js', {
	enabled: environment.production
})
We imported the ServiceWorkerModule into the AppModule and registered the service-worker in the application for the production environment only. After that, the production assembly of our application will include a service worker. This is the default configuration:
{
  "index": "/index.html",
  "assetGroups": [{
    "name": "app",
    "installMode": "prefetch",
    "resources": {
      "files": [
        "/favicon.ico",
        "/index.html",
        "/*.css",
        "/*.js"
      ]
    }
  }, {
    "name": "assets",
    "installMode": "lazy",
    "updateMode": "prefetch",
    "resources": {
      "files": [
        "/assets/**"
      ]
    }
  }]
}
Briefly about the keys:
"index" - path to the main index.html;
"assetGroups" - an array of groups of application resources with different caching options;
"name" - a name of the resources’ group;
"installMode" - string parameter, that determines the way in which the resources of the group will be initially cached;
"prefetch" means, that all application resources are cached regardless of the requests to load them;
"lazy" - caching only those resources, the request for which was sent to the server;
"updateMode" - determines the caching policy of resources that were previously cached, and at the given moment a new version was discovered. Like "installMode", it can take the values of "prefetch" and "lazy";
"resources" - include paths to application resources to be cached. There are two types of resources paths:
"files" - paths to files in the project distribution directory;
"urls" - URLs or patterns of external resources requested by the application.
As you can see, the default settings of the service-worker assume immediate loading of the critical components of the application (index.html, all files of scripts, styles, and also the favicon). The lazy boot option is applied to all the contents of the assets’ directory since these resources are not so important for the application to work.
Also read our article: Optimization of the Angular 2+ app download speed.
3.3 Web manifest configuration
Next, let’s take a look at the web manifest. The manifest file itself is in the source directory. During the project building, Webpack copies it to the distribution directory. The manifest is connected in the head of the document via a link.
<link rel="manifest" href="manifest.json">
Consider the structure of the manifest generated with Angular CLI:
{
  "name": "progressive-web-app",
  "short_name": "progressive-web-app",
  "theme_color": "#1976d2",
  "background_color": "#fafafa",
  "display": "standalone",
  "scope": "/",
  "start_url": "/",
  "icons": [
    {
      "src": "assets/icons/icon-72x72.png",
      "sizes": "72x72",
      "type": "image/png"
    },
    ...
    {
      "src": "assets/icons/icon-512x512.png",
      "sizes": "512x512",
      "type": "image/png"
    }
  ]
}
Briefly about the keys:
"name" - the name of the application that will be displayed below the icon;
"shortname" - will be used in cases where the place to display the full name is not enough;
"themecolor" - specifies meta attribute with name="theme-color";
"backgroundcolor" - sets the color of the page before it boots;
"display" - is responsible for your site to be displayed (with address line or without it, etc.);
"starturl" - the URL that opens when you click the icon;
"icons" - set of icons of different sizes.
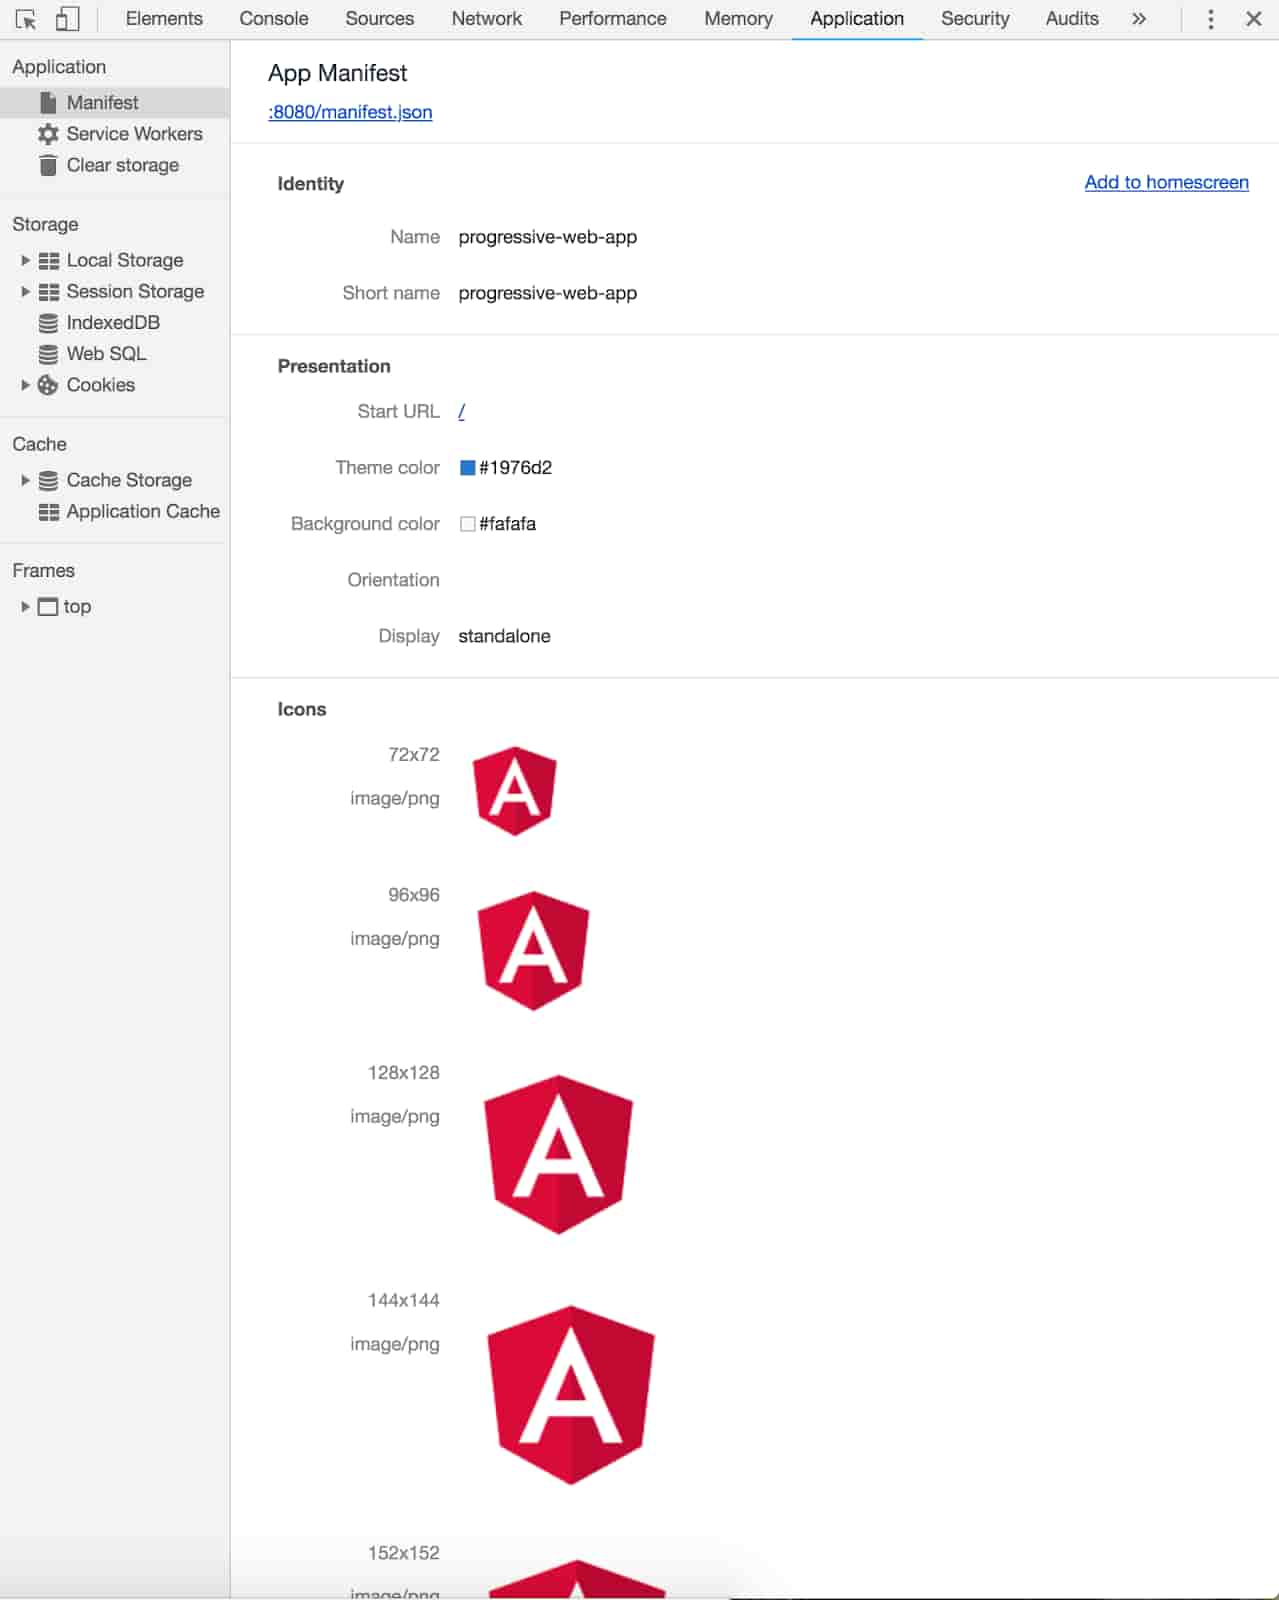
To check if the manifest is properly connected, you can also use Chrome Dev Tools: Application tab -> Manifest. If everything is done correctly, you would see something similar to the following picture, namely - the description of the site and a number of icons.
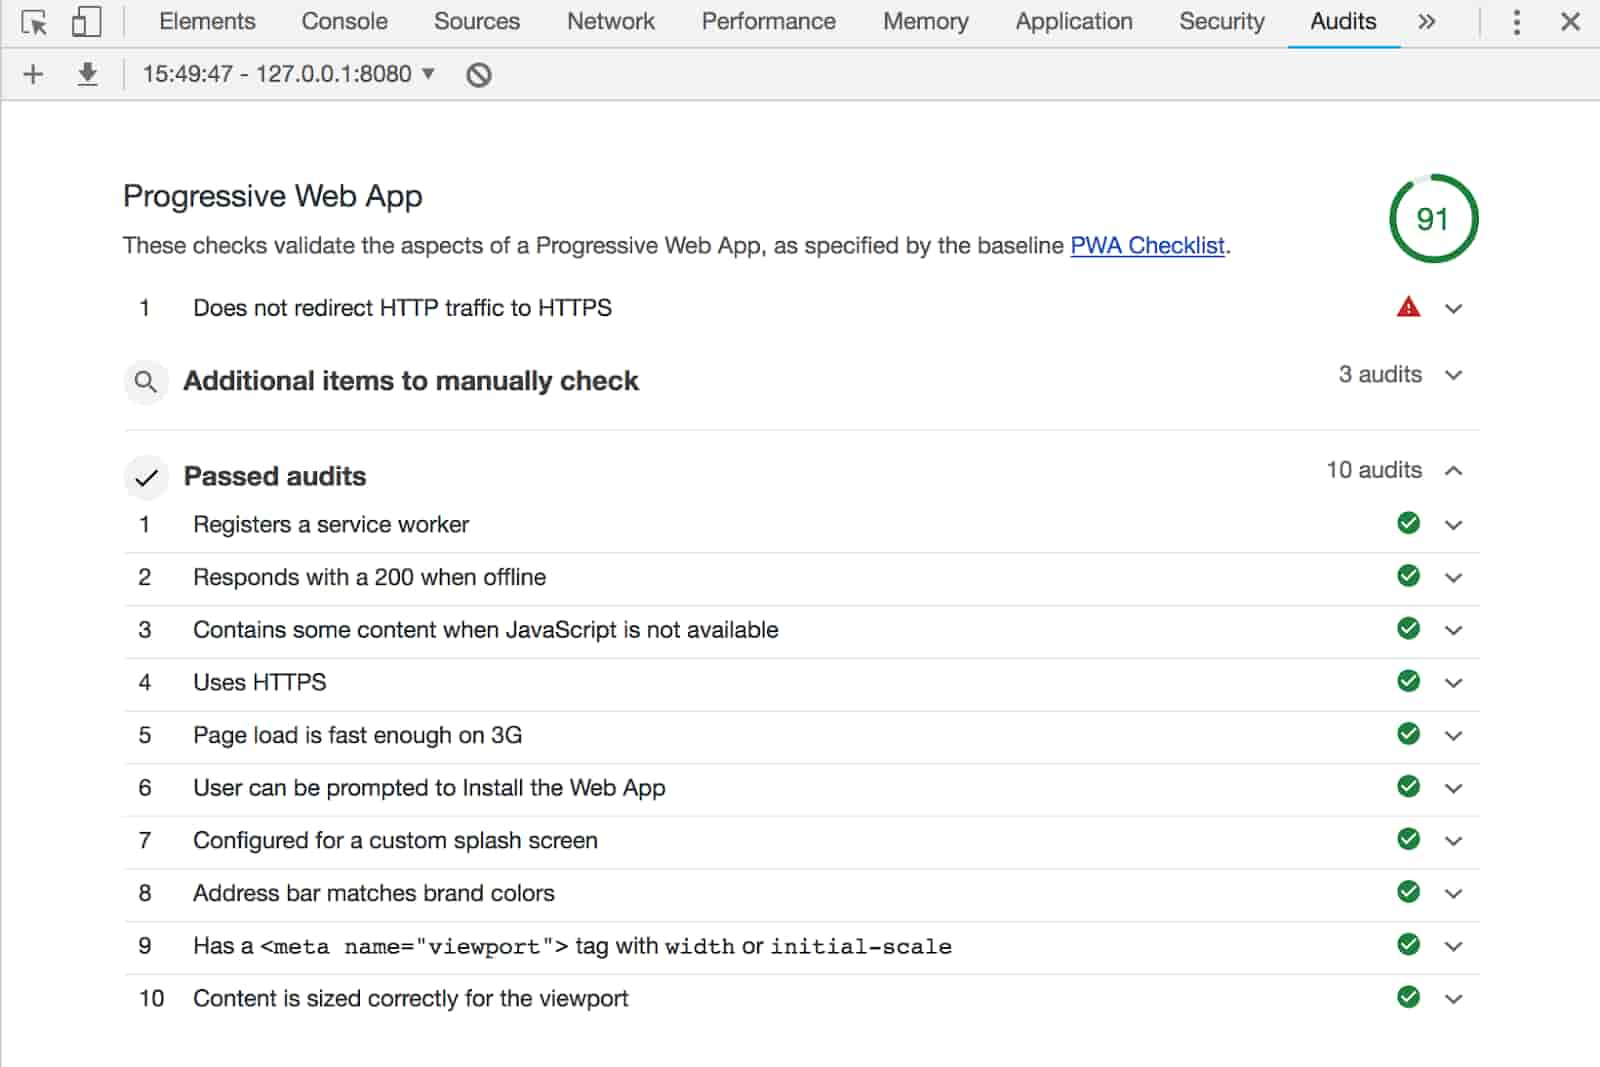
4. PWA testing
Now, after discussing the configuration of the service-worker and web manifest, it's time to check our application for compliance with the PWA again. The results will be much better than before.
Conclusion
As it was mentioned before, we didn't consider the server settings at the moment. And we have successfully eliminated all the shortcomings on the part of the application. In fact, all the work has been done by Angular CLI. In the case of a real project, we would only need to fill in the configuration files correctly and to replace the icons. Thus, we were convinced that the transformation of the Angular application into PWA using the Angular CLI proved to be extremely easy.
The code of the example considered in the article can be found in the GitHub repository.
If you've got a bold idea for your next startup, feel free to contact us and our skilled team will help you to produce a top-notch product.


