
Intro
How often did you get an idea to create something of your own, interesting and new, something that you have never done before in your life? You turned on the heat, began to look into how to implement it, but finally burned out at the stages:
When you started collecting information and realized that you did not have enough knowledge/tools/money, etc.;
When you started implementing the idea, faced difficulties and gave up at the very first stage;
Having completed the first steps, you faced new problems, then stopped since there were lots of new and unknown.
Sounds familiar, isn't it? On our Earth, there are more unfinished paintings, unfinished pools, unfinished birdhouses than amateur masterpieces of art, happy children in pools and well-fed birds.
In 90% of cases, all incomplete business was associated with incorrect planning or with a lack of awareness of the whole picture. You simply did not recognize and were not prepared for the difficulties that you faced. You only knew your next step, but did not know how much you still have to go. Having realized that, there was no motivation for further movement.
Who'd have thought that more than one brush would be needed to paint a picture, that there could be stones under the ground, and a hole for birds should be cut before you hang the birdhouse on a tree. You saw the hill, reached it, and only then saw the next one. Demotivating, isn't it?
You can find video podcast of this article on our YouTube channel👇
Why Did I Write this Article?
I have been thinking about writing an article for a long time, however, I kept putting it off. Having been in development for 5+ years, I would like to share my experience. During the first two years of developing mobile applications, I understood that if I had come across such a road map on React Native before starting the study, then I likely would not have become a mobile application developer at all. Or, at least, I would know the scope of work and not give up in front of the next hill.
It’s important to understand that if you are going to do something more complicated than a calculator, then regardless of what tools you choose to develop the frontend of your application and whether you are going to store user data, synchronize accounts on different devices or do business logic, you will need a backend. The options for the backend are described in the article below. Therefore, if you thought that you would not have to bother with it, then it’s better to find out about it right away.
Who will benefit from this article?
Those who wish to become a mobile application developer and want to look at the scope of knowledge required for development;
Those who choose languages and frameworks for mobile development;
Those who want to develop an application for themselves and want to understand how long it may take;
Those who choose a direction in development.
What’s in this article:
Tips for choosing the right language and framework;
Step-by-step analysis of basic tools and libraries required for development;
Comparison of different methods and approaches in development;
Charge of motivation not to throw up everything after a couple of days of study.
You will not find in this article:
An example of developing a mobile application;
Dull description of libraries from documentation.
Main part
So, if you have read up to this part of the article, then you are really thinking about developing a mobile application. And it is not surprising, because mobile applications...
Here is boring information about the market share of mobile applications among all applications, the growth of their number every year, the listing of super-large and cool companies that have mobile-only apps.
As you can see from these statistics, you are absolutely right in your choice!
1. Choice of Language and Framework
Having decided on the direction, you need to choose the platform/platforms for which you are going to write. The choice of language/framework will depend on this.
Briefly about the main options:
NATIVE (supported by a specific OS):
1. Android – according to Statcounter, more than 70% of wearable devices are running on Android.
Programming languages:
Java is the official native language for Android. Good control on a low level, but difficult for beginners.
Kotlin is positioned as the second official language for Android. Compatible with Java, but more accurate and simple. More preferable for beginners than Java.
2. iOS – if you focus only on iPhones and iPads.
Programming languages:
Objective-C has been the only language for mobile iOS development for a long time. The syntax is based on the C language. Due to the fact that the language is not the most developer-friendly, it loses to modern Swift.
Swift is a second language for iOS. It is simpler and clearer than Objective-C, therefore more preferable for beginners.

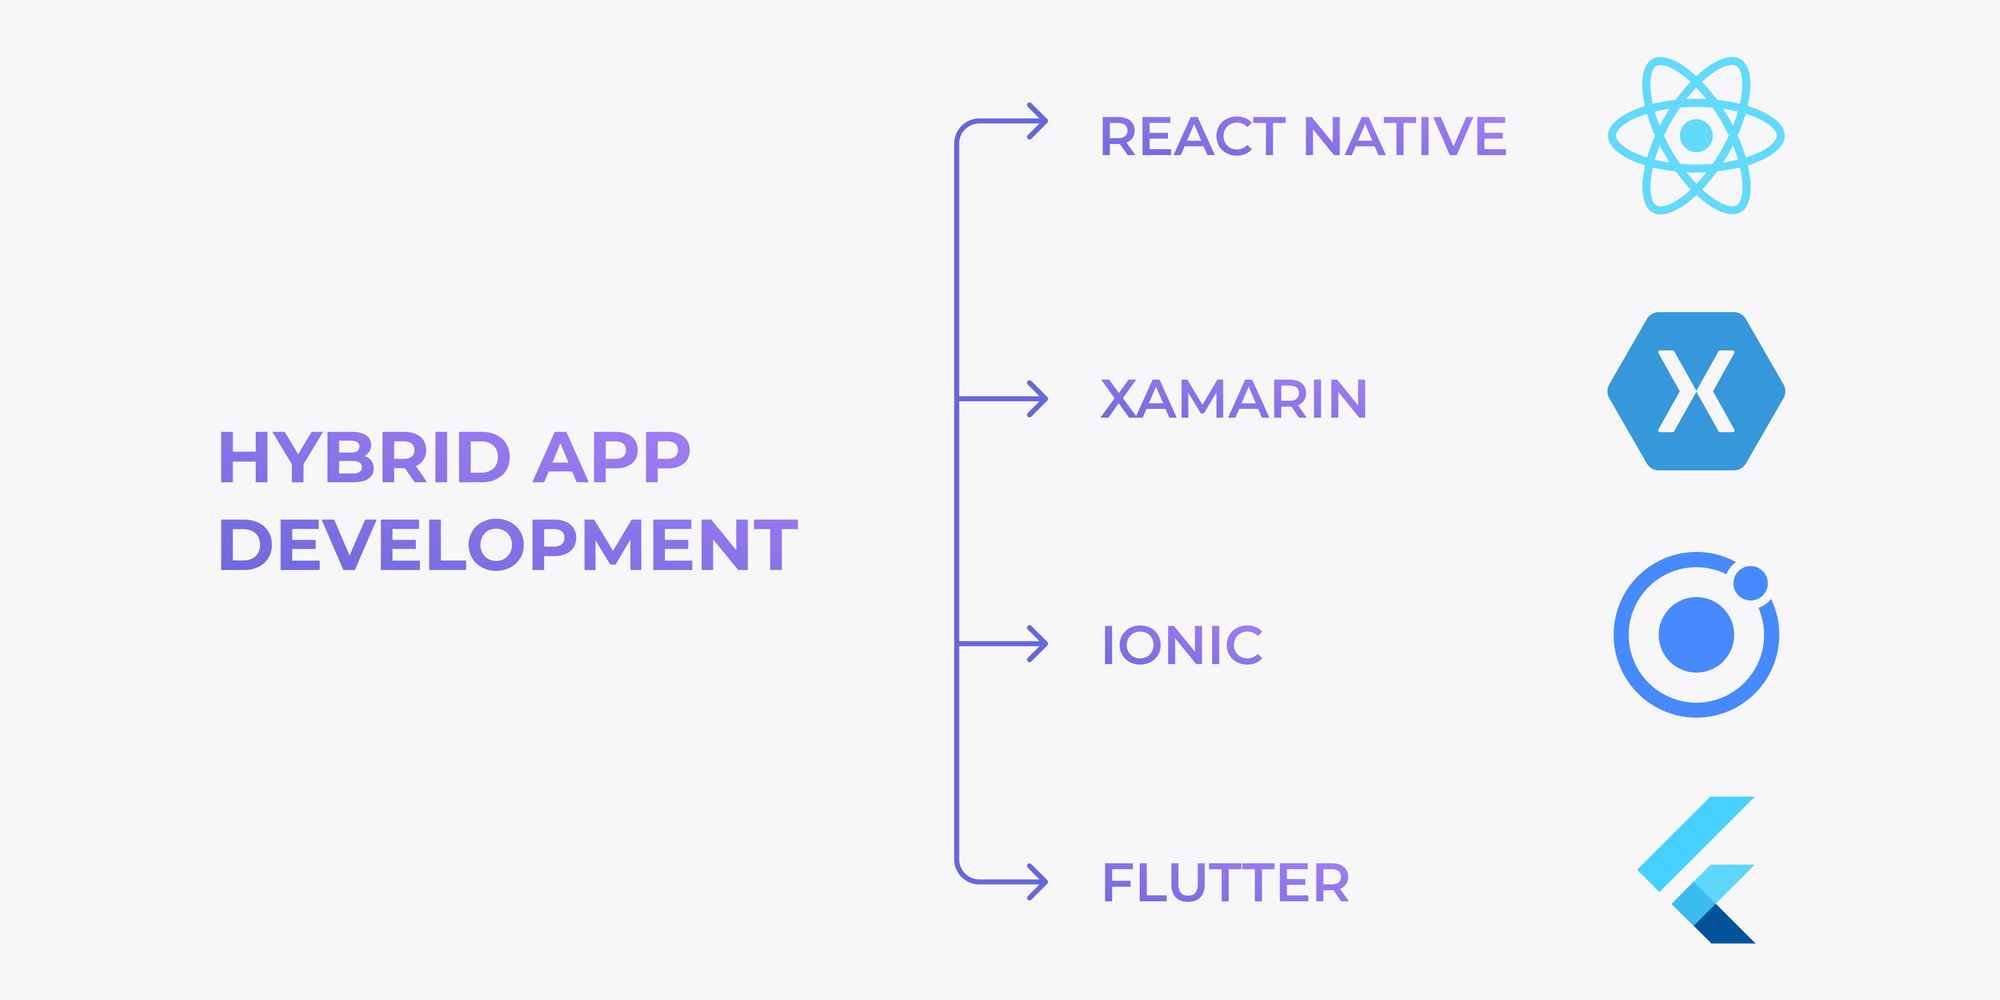
HYBRID (both Android and iOS):
Frameworks:
React Native is one of the most popular cross-platform development frameworks. Language – JavaScript. Owned by Facebook, has a huge community.
Flutter is quite a popular choice for mobile development. Language – Dart (syntax is similar to JavaScript). Owned by Google, developing well.
Xamarin is a .NET based framework. Language – C#. Owned by Microsoft.
Ionic is a framework that allows using HTML, CSS & JavaScript to develop mobile applications.
Others – Appcelerator Titanium, Apache Cordova (formerly PhoneGap).
There is a huge number of articles and tables with the pros and cons of each language/framework, and every inexperienced developer gets into difficulties when choosing. I offer you my simple "chain" that will lead you to the right choice using the exception method. First of all, let's see what can be excluded at once:
Native languages – great performance, leave it.
Take statistics on the use of frameworks by developers for 2019 and 2020 and select the top-2. Cordova, Ionic, Xamarin are good options, but we are looking for the most optimal.
Then, choose from the remaining options following the diagram below.
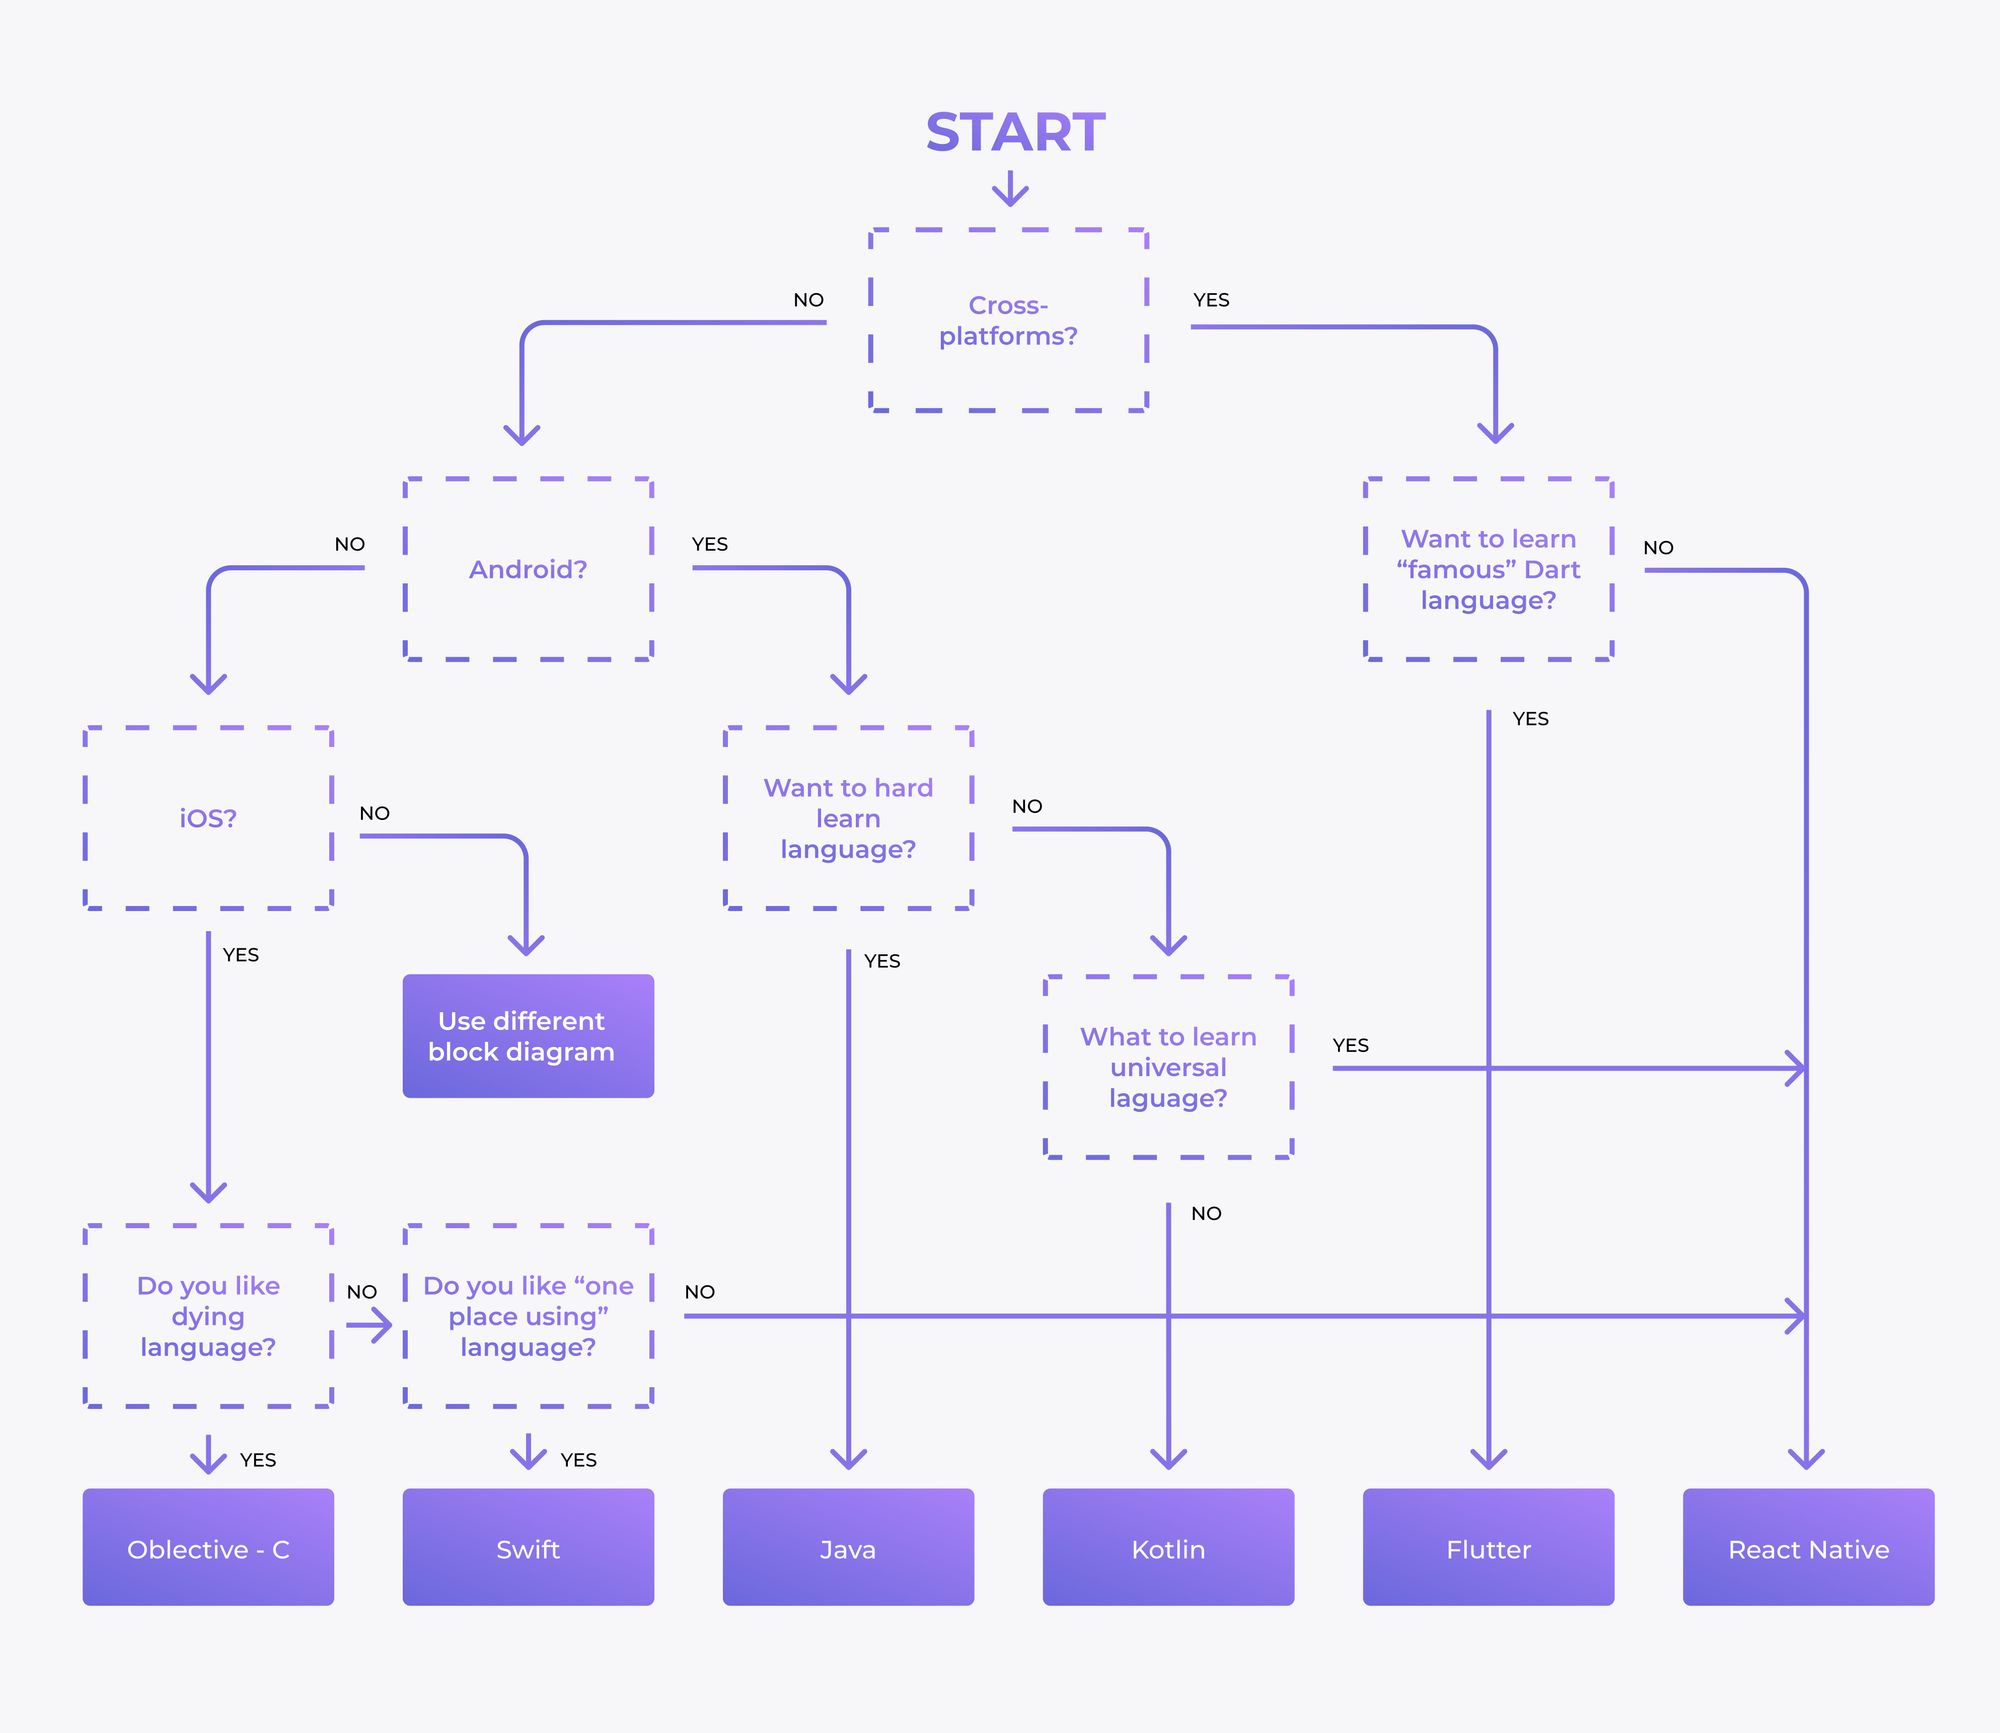
If there is a need to share your code with the web version, then React Native allows easily transferring your code written in Javascript to the browser, unlike other languages and frameworks.
For sure, performance is better when writing in Swift and Kotlin, but is it worth spending time on learning two languages to write one simple functionality? And what about the famous DRY principle? After all, we will write the same thing, but in different languages. This is more a joke than a truth. Or not?
The choice is yours, it's up to you, and I will not push you to anything. But still, I'll quote one famous person:
It doesn't matter what you choose to develop a mobile application, the main thing is that React Native” © Jason Statham
2. Preparation for Work
So, you've chosen React Native. I tell you what, it is an excellent choice. However, I have to say that if you do not know JavaScript and React Native, then you should understand at least the basics. Start with JavaScript, learn from books, courses, youtube videos – to your liking. Just choose the up-to-date materials, do not learn according to the 2008 manuals. It's the same with React Native. If you have the time and desire to master web development at once, you can start learning ReactJS after JavaScript, and then React Native. The ReactJS library is very similar to React Native, so after mastering it, you will need to figure out the differences between React Native. And now you can write both for web and mobile.
In order not to move away from the main goal, spend no more than a month on this. Then you may return to the basics during development. And, of course, you shouldn't take a 3-year course if you just wanted to write your own application.
I would definitely recommend using TypeScript in your project. Typescript is a Javascript add-on used for static type definitions in development. You will ask: "Why do I need typing in my application if I can save time and do without it?"
Let me give you an analogy:
Let's say every week you send a box of oranges to your grandmother in the village. And your friends who come to visit you put an orange in this box. At the end of the week, you take this box, which says "Oranges", pack it and send it to a happy grandmother in the village. A strange life situation, but still. This is JavaScript.
Everything goes well as long as friends put oranges in the box. Then someone decides to put half an orange there, someone puts kiwi, and someone puts stones. You pack, send, but the grandmother can't understand why the juicer stopped working. And now you start checking presents and letting in only those friends who brought the orange. This is TypeScript.
So, it's up to you – to hope for the honesty of friends or become a little more vigilant.
The next step is to make sure you know what is needed to develop and deploy your app. And I'm not talking about system requirements or your IDE for development:
If you want your application to have registration, login, user data, synchronization on different devices, then you need a backend for this. There are the following options:
CloudKit – if you focus only on iOS and you do not need any business logic, but only data storage.
Use any of the backends as a service (BaaS) – Firebase, Mobile Hub, Azure mobile app tools, GraphCMS and others.
Write a custom backend and host it on AWS EC2, Heroku, Azure Virtual Machine, Google Compute Engine, etc.
For example, in order to build an app for iOS and publish the app in the App Store, you need a Mac device for development (except when you use Expo).
To publish the application in the App Store or Play Market you will have to pay $99/year and $25/year, respectively.
3. Application Creation
3.1 Expo or React-Native CLI
In the React Native documentation at the development environment setup page, we are asked to choose between Expo CLI Quickstart and React Native CLI Quickstart.
Expo is a framework with a set of tools and services for React Native. For beginners, I would recommend using Expo for several reasons:
Easier and faster. To create the application is easier and faster from start to deployment. Expo will relieve you from headaches by doing everything under the hood. In other words, Expo will probably help you not to fail too early.
No native code. It isn’t that you often have to dig into native code when developing without Expo, but with it, you don't even need to understand what kind of native code it is. By the way, there is no native code, Android Studio and Xcode are not needed, which will also help to avoid some headaches.
Built-in API. Access to a large number of built-in API will allow you to easily work with the camera, GPS location, push notifications, contacts, etc.
Still, it should be understood that Expo is an option for the first steps. If you expand your application, then in the near future you will face the fact that Expo will not support what you want to integrate. And you have to get rid of Expo in the project, which can be very difficult.
3.2 Selecting Tools and Libraries
To sum up, learn JavaScript to a basic level → learn React Native to a basic level → choose Expo/no Expo. Sounds real.
My advice is to use functional components and, accordingly, hooks when developing. One can argue about the advantages and disadvantages of functional components over class ones, but the vector of development of React and React Native clearly goes towards functional components. It's like the youngest child in a family, it seems like the older one is supported, but all the forces are concentrated on the youngest.
Let's now decide which libraries you might need.
1. UI
Regardless of what your application is for, it should look good and it shouldn't take long. Choose a tool for creating UI. Most popular options:
It will not be difficult to figure out how to work with these libraries, so your application will quickly be filled with buttons, icons, tabs, etc.
If necessary, you can find ready-made libraries for animations, chats, maps, etc.
2. Navigation
I assume that you will have more than one screen in the application. It would be great. Here is one option – React Navigation. Switching from one screen to another and back should be quick enough. As required, look in the official documentation and add into your application. It will be a little more complicated than with UI components, but there are many tutorials, so in the end you will figure it out.
3. Fetch data
You will definitely need to request, receive and display data in the application. In the official documentation, React Native offers basic Fetch API and axios options. In most cases, at the entry level, this will be enough for you. You will be able to receive data asynchronously, modify it, and catch errors.
In the future, I recommend taking a closer look at GraphQL and a client for it, for example, Apollo Client. GraphQL is a query language for recieving only the required data (graphql should then be used on the backend too). Apollo Client will probably allow you not to use Redux, MobX, Redux-Saga, RxJS, etc. But, until you reach the high of REST API capabilities, do not rush to use everything and anything.
4. State management
When (if) you realize that you lack the use of the received data in the place where you receive it and you need to use this data in several places, and forwarding data through props from parent to child elements is already like moving in a metropolis at rush hour – it's time to think about data storage.
And there are two main approaches. I would call them the first and second:
First (classic). You start using Redux or MobX. You create a store where you keep the data received from the server, write actions, reducers, selectors, then start using Redux-Saga, RxJS with Observable for asynchronous requests and try to synchronize your local store with remote all the time. It even sounds confusing, doesn't it? But still, in most cases, this is the main option in React/React Native projects.
Second (alternative). As I wrote above, if you see that the application is expanding, there is more and more data, and if the backend allows you to use graphql, use it. Basic Apollo Client settings do not require deep client research. Later you may have to dig into the documentation (for example, how to work with the cache), but in the meantime it will be enough to read how graphql works, look at how to connect Apollo, how to create query and mutation.
5. Forms
If you need to create a login, registration form, etc. – you definitely shouldn't try to add custom inputs and submit buttons. Use ready-made solutions. Formik and React Hook Form are the main options. I would recommend the second option, just because the code looks cleaner, plus these are hooks (we are progressive guys).
These five points are enough for you to complete 90% of your initial tasks. For everything else, either go to the React Native Directory, or write custom elements for your tasks.
Final Thoughts
Let's summarize the training plan for creating your mobile application:
Learn JavaScript at least at a basic level.
Learn React Native, at least at a basic level (if you have the time and desire to get acquainted with web development, then first find out more about ReactJS before learning React Native).
Choose an option for the backend.
Decide what to use – Expo or React Native CLI.
Create UI.
Add navigation.
Add fetching data from the server.
Add state management if needed.
Add all the required components to the application.
It may seem that it is too much and you would like everything to work in a week. But you don't hope to learn to drive or to cook in a week, do you?
Now you see the whole picture and you can decide whether you are ready for an exciting journey called mobile development!


